Front Axle Assembly Replace
F-150 & BRONCO1. Raise front of vehicle and support with safety stands under radius arm brackets.
2. On 1980 models, drain fluid from differential.
3. On all models, remove front tires and brake calipers. Position calipers aside, leaving brake lines attached. Do not allow weight of calipers to hang on brake lines.
4. On 1980 models, remove wheel hub and rotor assemblies, spindles, splash shields and axle shafts.
5. On all models, support axle arm assembly with a suitable jack and remove upper coil spring retainers. Carefully lower jack and remove coil springs, spring cushions and lower spring seats. The axle must be supported when removing springs and not be permitted to hang by brake hose. If length of brake hose is not sufficient to permit spring removal, it will be necessary to remove the disc brake caliper. Do not suspend caliper by brake hose, if removed.
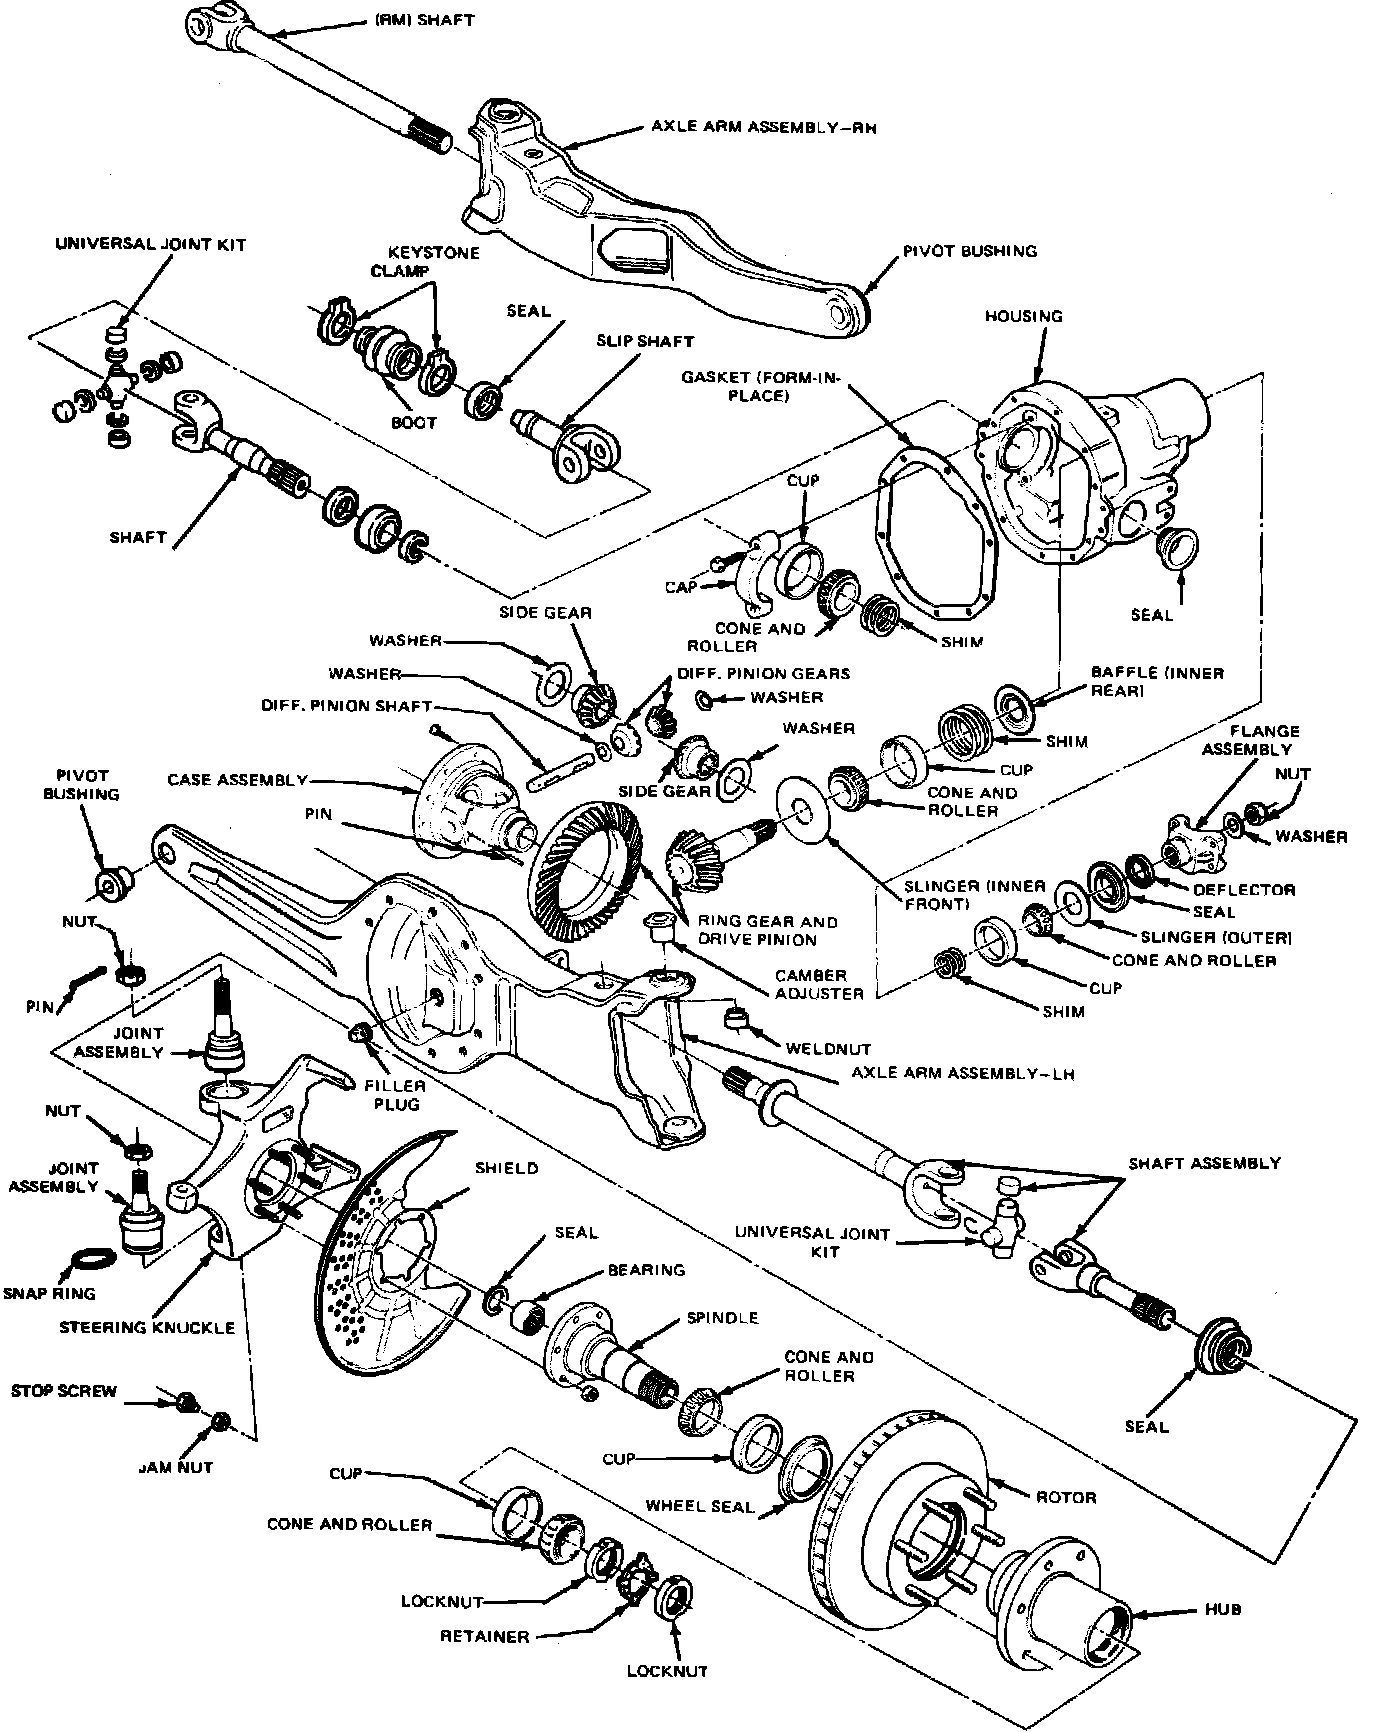
Fig. 1 Four wheel drive front axle assembly. 1980---87 F-150 & Bronco (similar to other 1980---87 models exc. 1986---87 F-350 w/Dana 60 Monobeam axle):
6. Remove shock absorbers.
7. On 1980 models, remove upper and lower ball joint nuts and steering knuckle.
8. On all models, remove stud and spring seat from radius arm and axle arm, then the lower radius arm to axle arm attaching bolt.
9. Disconnect vent tube from left axle arm assembly on 1980 models, or from differential housing on 1981---87 models. Discard hose clamps. On 1981---87 models, remove vent fitting from differential housing and install a 1/8 inch pipe plug.
10. Remove right axle arm to crossmember pivot bolt.
11. On 1984---87 models, remove right axle shaft boot and discard boot clamps.
12. On all models, remove right drive axle assembly, and on 1981---87 models, slide axle shaft out of slip shaft.
13. Support differential housing with a suitable jack.
14. On 1980 models, remove differential retaining bolts.
15. On all models, remove left drive axle assembly attaching bolts and the axle assembly, Fig. 1.
16. Reverse procedure to install.
F-250---350 EXC. 1986---87 F-350 W/DANA 60 MONOBEAM AXLE
1. Raise and support front of vehicle.
2. On 1980 models, drain fluid from differential.
3. On all models, remove front tires and brake calipers. Position calipers aside, leaving brake lines attached. Do not allow weight of calipers to hang on brake lines.
4. On 1980 models, remove hub and rotor assemblies, spindles, splash shields and axle shafts.
5. On all models, support right axle assembly with a suitable jack and remove 2 U-bolts attaching shock absorber mounting plate and leaf spring to axle assembly.
6. On 1980 models, remove upper and lower ball joint nuts and steering knuckle.
7. On all models, disconnect vent tube, from left axle arm assembly on 1980 models, or from differential housing on 1981---87 models. On 1981---87 models, remove vent fitting from differential housing and install a 1/8 inch pipe plug.
8. Remove right axle assembly to crossmember pivot bolt and the axle assembly.
9. On 1984---87 models, remove right axle shaft boot and discard boot clamps.
10. On 1981---87 models, slide axle shaft out of slip shaft.
11. On all models, support left axle arm assembly with a suitable jack and remove 2 U-bolts attaching shock absorber mounting plate and leaf spring to axle assembly.
12. On 1980 models, remove steering knuckle from left axle arm assembly.
13. On all models, support differential housing with a suitable jack, then remove left axle assembly to crossmember pivot bolt and the axle assembly.
14. Reverse procedure to install.
1986---87 F-350 W/DANA 60 MONOBEAM AXLE
1. Raise and support vehicle.
2. Remove front wheels and the wheel hubs.
3. Remove brake calipers from rotors and wire out of way. Do not let brake caliper hang by hose.
4. Remove stabilizer bar.
5. Remove cotter pins and castellated nuts securing spindle connecting rod to steering knuckles and separate connecting rods from steering knuckles. Wire steering linkage to spring.
6. Remove two nuts and U-bolts from front axle U-joint flange, disconnect axle from front axle pinion flange and securely wire driveshaft to frame.
7. Disconnect vent tube at axle housing and plug vent fitting.
8. Remove nut and bolt and disconnect tracking bar from righthand spring cap.
9. Carefully lower vehicle until it is approximately three feet from floor, then place safety stands on front leaf springs approximately half way between front axle leaf spring and the rear mounting shackle. Lower vehicle so that springs rest on safety stands.
10. Place suitable jack under differential carrier, then remove U-bolts and nuts securing axle to spring.
11. Carefully lower axle from vehicle.
12. Reverse procedure to install.