Direct Clutch
Direct Clutch
Refer to Fig. 39.
Disassembly
1. Remove the No. 7 direct clutch hub inner needle bearing and bearing support.
2. Remove the clutch pack selective retaining ring.
3. Remove the clutch pack from the drum.
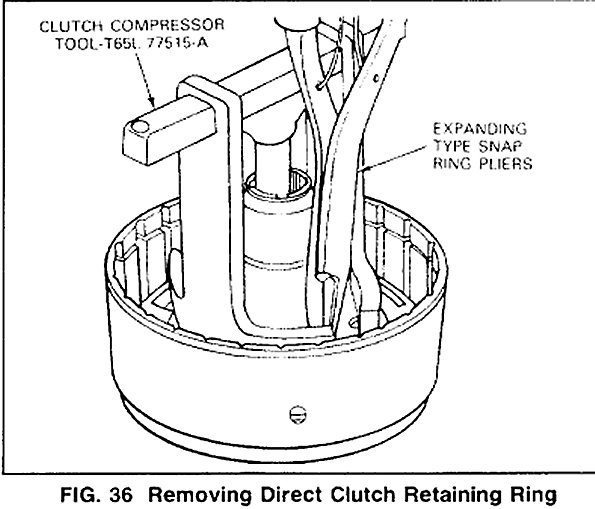
4. Using Clutch Spring Compressor Tool T65L-77515-A (or equivalent), compress the piston return springs and remove the retaining ring (Fig. 36).
5. Remove the spring retainer assembly and piston from the drum. (Use air pressure, if necessary to remove piston.) Make sure the ball check in piston is free. Note the position and direction of the lip seals and then remove them.
6. Inspect the direct clutch piston check ball (Fig. 43). Perform the direct clutch piston check ball leakage procedure. Direct clutch piston check ball - inspect the piston check ball for freedom of movement. Improper seating of the check ball will cause leakage. Leakage can be detected by turning the piston upside down (flat side of pistoin facing you) allowing the checkball to seat in the piston. Pour a small quantity of solvent over the check ball. If solvent drips past the check ball, replace the piston.
Assembly
1. Install a new inner piston seal on the clutch drum hub as follows:
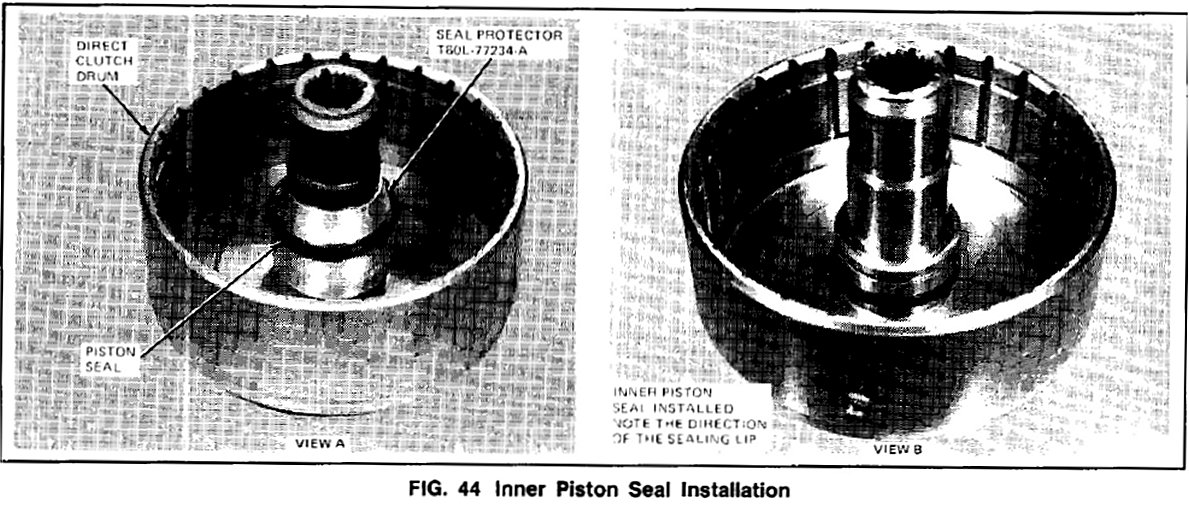
a. Position Seal Protector T8OL-77234-A over the clutch drum hub (View A, Fig. 44).
b. Lubricate the seal and the seal protector with petroleum jelly.
c. Position the seal over the installer tool with the sealing lip facing down (View B, Fig. 44).
d. Push the seal down until it snaps off the end of the protector onto the clutch hub.
e. Remove the seal protector from the clutch hub.
f. Slide the seal up until it seats in the seal groove.
2. Install a new outer clutch piston seal. Note the direction of the sealing lip before installation. The lip points away from the spring posts.
3. Install the clutch apply piston as follows:
a. Coat the piston seals, the clutch drum sealing area, and the piston inner seal area with petroleum jelly.
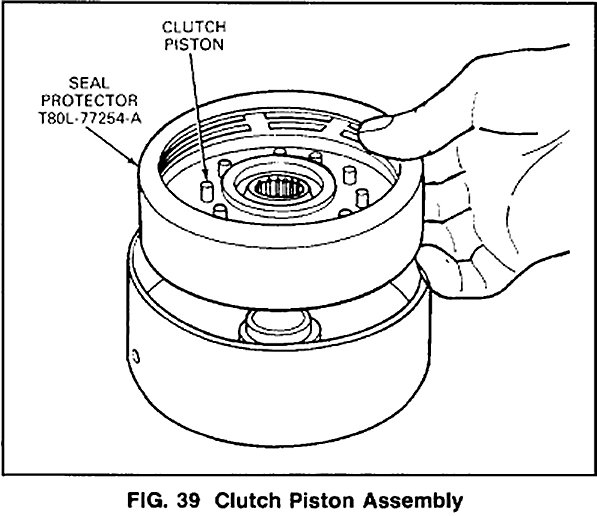
b. Install the piston in Seal Protector T8OL-77254-A (or equivalent) as shown in Fig. 39.
c. Position the tool in the clutch drum and push the piston to the bottom of the drum using even thumb pressure.
4. Install the piston spring and retainer assembly and retaining ring using compressor Tool T65L-77515-A or equivalent.
5. Install the clutch pack.
6. Install the clutch pack selective retaining ring and check the clearance between the ring and the pressure plate. The pressure plate should be held downward as the clearance is checked. The clearance should be: 4.9L (300 CID) Engine, and the 5.OL (302 CID) EFI Engine 177mm (0.067 inch). If the clearance is not within limits, selective snap rings are available in the following thicknesses:
0.050 to 0.054
0.064 to 0.068
0.078 to 0.082
0.092 to 0.096 inch.
Install the correct size snap ring and recheck the clearance.
7. Check the clutch for proper operation using air pressure. The clutch should be heard and felt to apply smoothly and without leakage.