Downshift and Manual Linkage
Downshift and Manual Linkage
Disassembly
1. Remove the nut and lockwasher that secures the Counter downshift lever to the transmission and remove the lever.
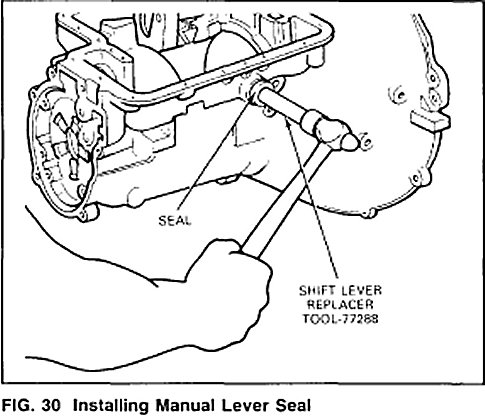
2. Slide the inner downshift lever assembly out from the inside of the case (Fig. 30). Remove the seal from the recess in the manual lever shaft.
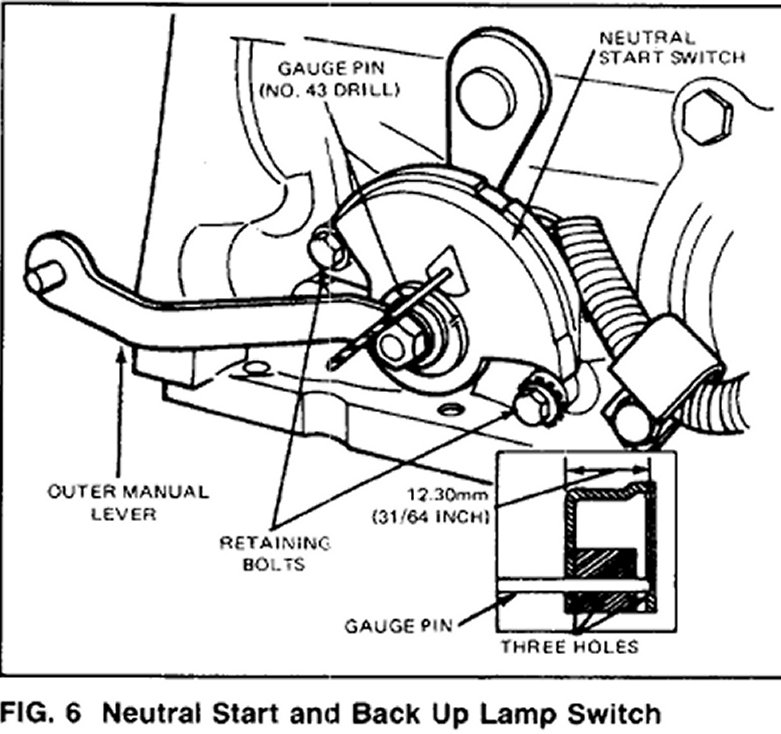
3. Remove the two bolts retaining the neutral start switch, and remove the switch, (Fig. 6).
4. Remove the C-ring securing the parking pawl actuating rod to the manual lever. Remove the rod from the case.
5. Remove the nut securing the inner manual lever to the shaft. Remove the inner lever from the shaft Slide the outer lever and shaft from the case.
6. Remove the seal from the case with tools T59L-100-B, slide hammer and T58L101-A, Puller Attachment.
Assembly
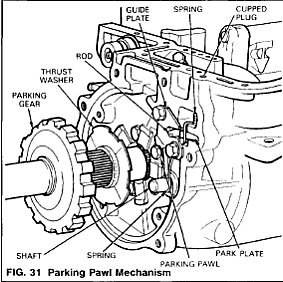
1. Dip the new seal in transmission fluid and install it in the case using TOOL-77288 as shown in Fig. 31.
2. Slide the outer manual lever and shaft in the transmission case.
3. Position the inner lever on the shaft, making sure the leaf spring roller is positioned in the inner manual lever detent Install the attaching nut Tighten the nut to 41-54 N.m (30-40 ft-lbs.. Install the parking pawl actuating rod and secure it to the inner manual lever with a C-ring.
4. Slide the neutral-start switch on the outer lever shaft and install the bolts in the case.
5. With the transmission manual lever in neutral, rotate the switch and install the gauge pin (No. 43 drill) into the gauge pin hole (Fig. 6). Tighten the bolts to 6.5-8. N.m (55-75 in.-lbs).
6. Install a new downshift lever seal in the recess of the outer lever shaft. Slide the downshift lever and shaft into position.
7. Place the outer downshift lever on the shaft and secure it with a lockwasher and nut. Tighten nut to 17-21 N.m (12-16 ft-lbs).